Veterinary Microscope with 100X DRY Objective - NEVER USE OIL AGAIN

How to use a microscope stage micrometer and eyepiece graticule
Size is important – especially when you’re talking about the characteristics of organisms like protozoa, bacteria or sperm cells.
There’s no using a tape measure though – you’ll have to get a little more inventive.
All you need is an eyepiece with a scale (called a graticule) and a tiny ruler called a stage micrometer. The names may sound scary but there’s no reason to worry!
With a little bit of maths, you’ll be calculating tissue and cell size in no time.
What is an eyepiece graticule?
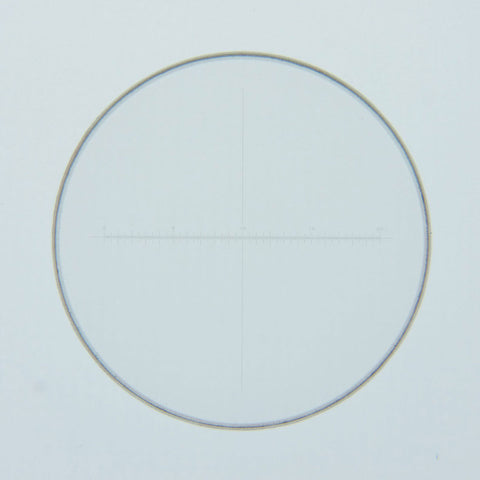
A graticule is a small piece of glass with a measurement scale on its surface that fits inside a microscope eyepiece. This scale is arbitrary and has no units.
When you look through the eyepiece, the measurement scale is superimposed over your specimen or sample – like a crosshair. You can also rotate the eyepiece 360 degrees so you can make measurements at any angle.
27mm Eyepiece Reticle with 20mm Horizontal Scale
Once calibrated, the graticule can be used to measure any cells or other structures viewed with the microscope on that magnification.
But to calibrate the graticule (that is, to convert graticule units into real units), you must first find out the distance that the divisions on the scale represent. This is where the stage micrometer comes in.
What is a stage micrometer?
A stage micrometer is a glass slide that also has a precisely measured scale on its surface. The markings are very accurate – the smallest markings are usually just 0.01mm (10µm) apart.
The slide is placed under the microscope lens just like any other slide.
You’ll look at this slide through the graticule and use it to calibrate your measurements.

Stage Micrometer 0.01mm Divisions
Why is it important to calibrate your measurements?
Even though you may be using two identical microscopes – let’s say each with 10x eyepieces and a 40x objective – they can still have slightly different magnification factors because of differences or defects in the optical pathways.
So you need to calibrate your eyepiece graticule with a stage micrometer before making measurements with your graticule. The graticule scale is arbitrary – it represents different lengths for different magnifications, so the scale needs to be calibrated for any new microscope or new magnification.
On the plus side, once calibrated, you can use the graticule every time you use your microscope (although each objective must be calibrated independently).
DOWNLOAD Calculating the Conversion Factor information.
How do they work together?
To calibrate the graticule takes a few steps. The stage micrometer is placed directly on the stage of the microscope and brought into focus. By rotating the eyepiece, both scales can be positioned parallel to each other.
By comparing them, you’ll know exactly how many of the graticule’s divisions are equal to an equivalent number of divisions on the micrometer.
Because you know the exact real distance represented by the micrometer divisions, you also know the real distances the graticule divisions represent at that magnification.
Now when you switch out the micrometer and put your sample under the lens, you can calculate the actual length of any structure viewed down the same microscope with the same magnification using the eyepiece graticule.
Potential inaccuracies
While this is a reasonable system of measurement, there are some factors that can influence your results.
Any defects in the lenses or optical system can introduce errors. If the scales on either the graticule or micrometer are inaccurate that will also affect your measurements.
Human error is always possible, so take extra care. Errors can be made during measurement and when aligning the two measurement scales, particularly at high magnifications.
Step by step guide to calibration
- Ensure your graticule is in place and switch your microscope to the magnification you want.
- Place the micrometer under your lens on the microscope stage.
- Look down the eyepiece and bring the micrometer into focus.
- Rotate the graticule until it’s parallel to the micrometer scale.
- Adjust the alignment of the scales so the zero values are lined up.
- Count the number of graticule divisions that line up with a convenient amount of micrometer divisions.
- Divide the value of the micrometer divisions in µm by the number of graticule divisions that were equivalent to get the real value of the graticule divisions (e.g. 200 µm / 35 graticule divisions = each division is 5.7 µm).
- Switch out the micrometer for your sample slide and use your freshly calibrated graticule to measure your specimens.
When you look into your eyepiece lens, the markings will always be the same but the size of the image superimposed under them will get larger with more magnification. So, as you change to a higher power objective lens, the represented value between marks will change proportionately. For example, if each mark represents 0.1mm with a 1X objective lens, then with a 4X objective lens, each mark will roughly represent 1/4 of 0.1mm or .025mm., which incidentally is 25 micrometers (there are 1000 um in one milimeter).
As an example, for a reticle that is 10mm long with 100 divisions (as shown above), each division was found to represent the following distances:
1X objective (true reading) 100um (0.1mm)
4X objective 25um
10X objective 10um
40X objective 2.5um
100X objective 1um
Conclusion
Calculating the size of a specimen is a great tool to have in your microscopy toolbelt. It also gives you some great perspective on just how tiny some of these specimens can be.