Veterinary Microscope with 100X DRY Objective - NEVER USE OIL AGAIN
Microscope eyepiece focusing explained
Did you know that everyone’s eyes are unique, including the distance between them?
So setting up your microscope’s eyepieces correctly is crucial.
Fortunately, adjusting the eyepieces to suit your eyes is a quick and easy process. Here’s how to do it.
Setting up your eyepieces
When setting up your eyepieces, the goal is to get a clear and focused image of your sample.
Since everyone's eyes are different, including the distance between them (called the interpupillary distance), you’ll need to adjust the eyepieces to fit your eyes perfectly.
Just move them closer together or farther apart until you see one clear circle through both eyepieces. This way, you’ll have the best possible view through the microscope.
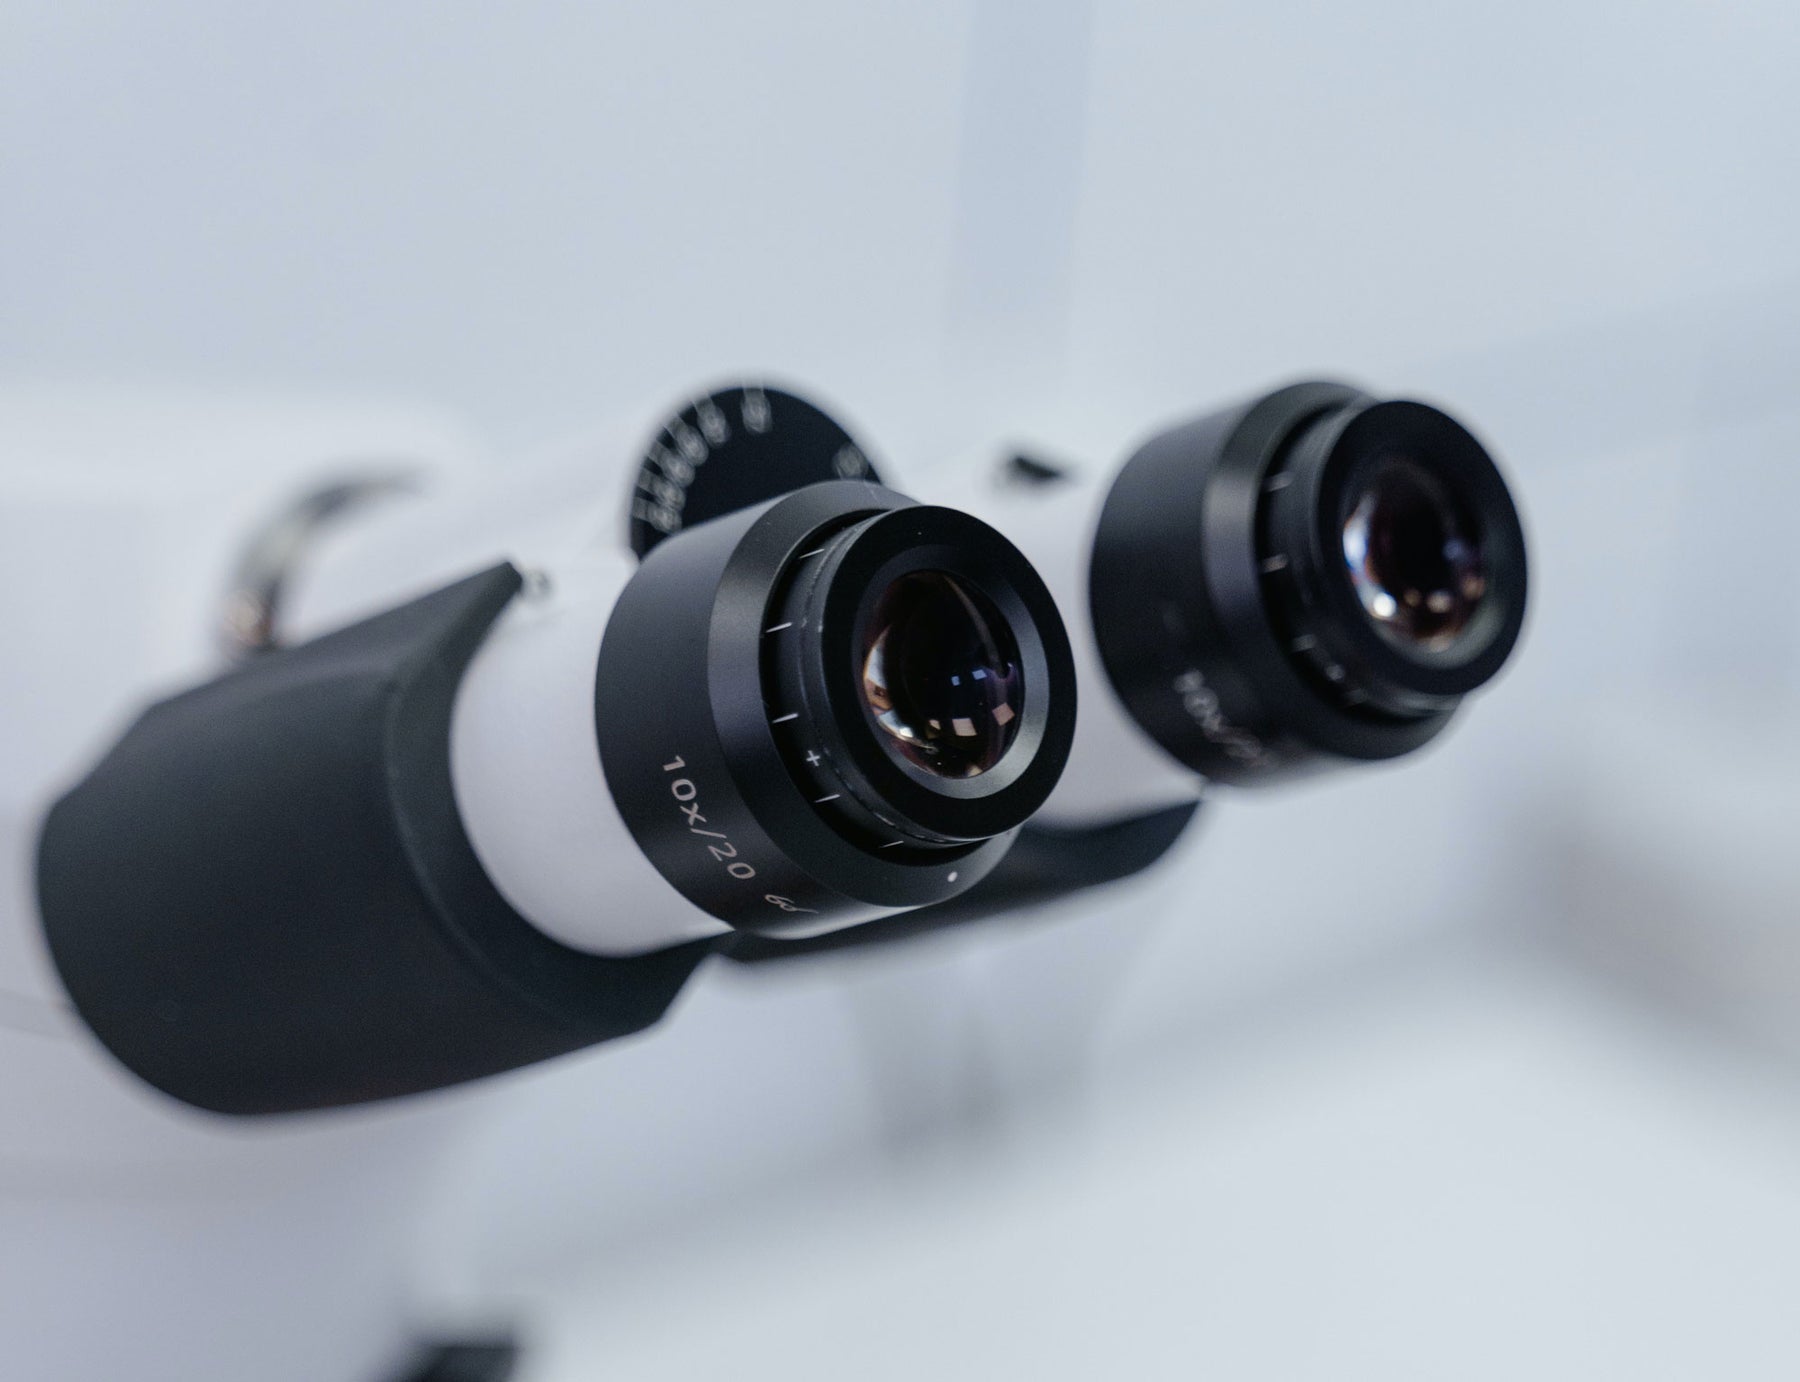
Adjusting the diopter
Once the eyepieces are in position, it’s time to account for the difference between each of your eyes. Every eye is different – even your left and right eye!
This is where the microscope diopter comes in. The diopter is adjusted using the small ring on the eyepiece that you can rotate with your fingers.

By adjusting the diopter to suit your individual eyes, you can make sure that both of your eyes see a clear, focused image of the specimen despite any differences in visual strength.
It will also make using your microscope more comfortable, reducing eyestrain and tiredness.
Diopter adjustment procedure
Step 1. Start by resetting your eyepieces to zero. Look closely at the eyepiece rim – it has numbers on it. Underneath, there’s a fixed part with a white line or marking. Rotate the eyepieces until the zero on the rim lines up perfectly with that marking below. This will set them to the starting position ready for fine-tuning.
Step 2. Rotate the 10x objective into position and place a sample slide under the microscope. Bring it into focus so you’re ready for the next step.
Step 3. Focus your first eye. Close one eye and look through the eyepiece with your other eye. Adjust the diopter ring on the eyepiece until the sample is in sharp focus.
Step 4. Focus the other eye. Shut the eye that was open and open the other one. Look through the remaining eyepiece and adjust the diopter ring until the image is in sharp focus.
Step 5. Switch to the 40x objective. This can pick up small focal differences that you might not notice at 10x. Look through each eyepiece individually again. If the images are slightly out of focus, repeat the above procedure.
Step 6. Record your diopter settings so that you can easily adjust the eyepieces whenever you use the microscope again.
Step 7. Remember to zero the eyepieces after use on shared microscopes – it’s only polite!
And that’s all you need to do! Once you figure out your interpupillary and diopter settings, you’ll be all set to use any microscope like a pro.