Choosing a Microscope for Beer Brewing Yeast Cell Counting
Brewing at home and want to up your game? A microscope is just the thing for you.
You might know that a microscope is good for yeast counts, but its biggest advantage is being able to check the health of your yeast – the real secret of the best brews!
For a good brew, you need a healthy yeast with good viability, good cell count and minimal contamination.
Monitoring the viability of your yeast is easy using a methylene blue stain, as dead or dying cells stain blue and the staining can be easily seen under a microscope.

Yeast viewed using a Phase Contrast Microscope
And you can perform a yeast count by using a hemocytometer, which consists of a defined grid etched onto the surface of the microscope slide. Counting lets you ‘pitch’ or add the correct amount of yeast to foster healthy fermentation.
Whether you’re interested only in the count or in the overall vitality and health of your yeast, you’ll need a basic microscope to take your home brew to the next level.
Types of Microscope
There is a surprisingly large variety of microscope types, but all you’ll need for homebrewing is the humble compound microscope. A simple student grade microscope will do the job – provided that it has the following features.
Magnification
- For simple counting, a biological microscope with a 40x objective and 10x eyepiece (combined 400x magnification) is all you need.
- For viability testing, and especially dyes, you will need to use the 400x magnification this makes testing easier.
- For basic analysis of cell morphology (size, shape and arrangement), you’ll need the 1000x magnification.
Numerical aperture
The numerical aperture (NA) value of a lens is a measure of its resolution – the higher the value, the higher the resolution.
It can be a very important quality because it determines how much detail you’ll see. If you’re looking at a yeast cell at high magnification but a low NA, you’ll only see a vague blob shape.
Having said that, you won’t need a high resolution for a basic yeast count so if that’s all you’re doing, don’t concern yourself with NA.
But if you are looking into morphological analysis, try to make sure your lenses have an NA of at least 0.80. You’ll need the increased resolution to make out cell shapes and structures.
Mechanical stage
When you use your microscope, your sample sits on a platform known as a stage.
Stages can be as simple as a flat piece of plastic or metal with a couple of clips to hold your slide in place (a stationary stage). If you want to see a different part of your slide you have to move your slide with your fingers. This can be finicky and it’s very easy to knock your sample out of focus or even right out of the field of view.
Better beer and wine-making microscopes have mechanically controlled stages that let you move your slide smoothly without any hassle. These are known as mechanical stages and they’re a huge help when you’re working at high magnifications where even a slight bump can knock a slide out of place and focus.
A mechanical stage is a cheap and handy addition that will save you a lot of time – and sanity.
Coarse and fine focus
Make sure you have both coarse and fine focusing! The fine focus adjustment is important, especially when using the microscope at the higher magnifications.
You’ll have a hard time focusing properly without a fine control knob, and you can easily damage your lens by accidentally ramming your slide into it if you’re not careful.
Abbe condenser with iris diaphragm
This is a lens system that sits between the light source and your yeast sample, giving you greater control over the light that shines through your sample.
It lets you control the brightness, contrast, resolution and depth of field – functionally making it much easier to see your yeast cells in detail.
While it’s not necessary for basic yeast counts, an abbe condenser is very helpful for viability assessment and morphology analysis.
Binocular headpiece
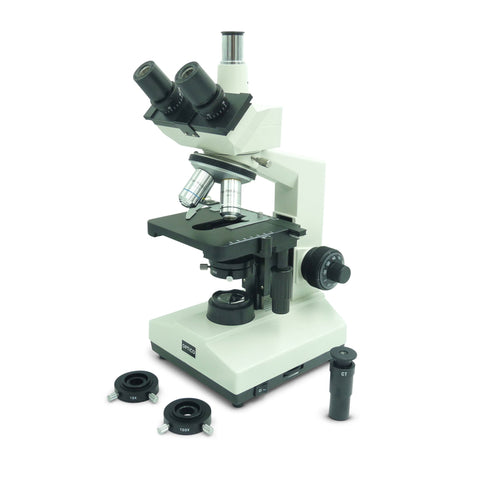
There are three options – monocular (single ocular), binocular (two oculars) or trinocular (two oculars plus a third for attaching cameras). A single eyepiece may be cheaper but staring with one eye closed for a long stretch, such as during a yeast count, can strain your eyes.
Binocular eyepieces (two eyepieces, one for each eye) are a much more comfortable experience if you’re going to spend any time looking at your samples.
Trinocular heads are more expensive, but let you attach a variety of cameras to the third eyepiece. If you aren’t on a tight budget, it can be a very convenient way to document the growth and health of your yeasts.
Which is the best beer brewing and wine making Microscope for Yeast Cell Counting?
Phase Contrast Microscopes
For the very best quality imaging for beer and wine-making it is advisable to choose a Phase Contrast Microscope to enable clear and accurate yeast cell counting, using the phase contrast technique will make viewing your yeast specimen easier to identify and speed up the process.

Budget Phase Contrast Beer Brewing Microscope
Optico XSZ-107T-PHA Phase Contrast Microscope (ACHROMATIC Objectives)

Advanced Phase Contrast Yeast Cell Counting Microscope
Optico XSZ-107T-PHB Phase Contrast Microscope (PLAN Objectives)
Taking pictures
It’s a good idea to keep a record of your yeasts so you’ll know what works and what doesn’t work in the future (or just because you want photos of your glorious creations).
The most convenient way is to simply use your smartphone. Just aim your phone camera down the eyepiece and you’re good to go. It can be a bit finicky to find the right angle, but it’s very possible and won’t cost you anything.
If you take your photography a little more seriously, you can invest in a microscope camera that fits into the eyepiece slot for a fairly low price.
If you opt for a trinocular microscope you can attach a digital microscope camera.

Professional Phase Contrast Beer Brewing Microscope
BM2000-PH Phase Contrast Microscope (Infinity PLAN Objectives)
The last word
A microscope is a great investment – and you won’t need to break the bank to improve the taste of your brew and the health of your yeast strains. With just the basic equipment, you’ll be one step closer to making that perfect beer.
Cheers!
