Veterinary Microscope with 100X DRY Objective - NEVER USE OIL AGAIN
How to use and adjust a compound microscope
A compound microscope is easy to use once you have the hang of it. However, it can be a challenge when you first start out.
To get you started, here’s a quick primer on how to use a basic compound microscope.
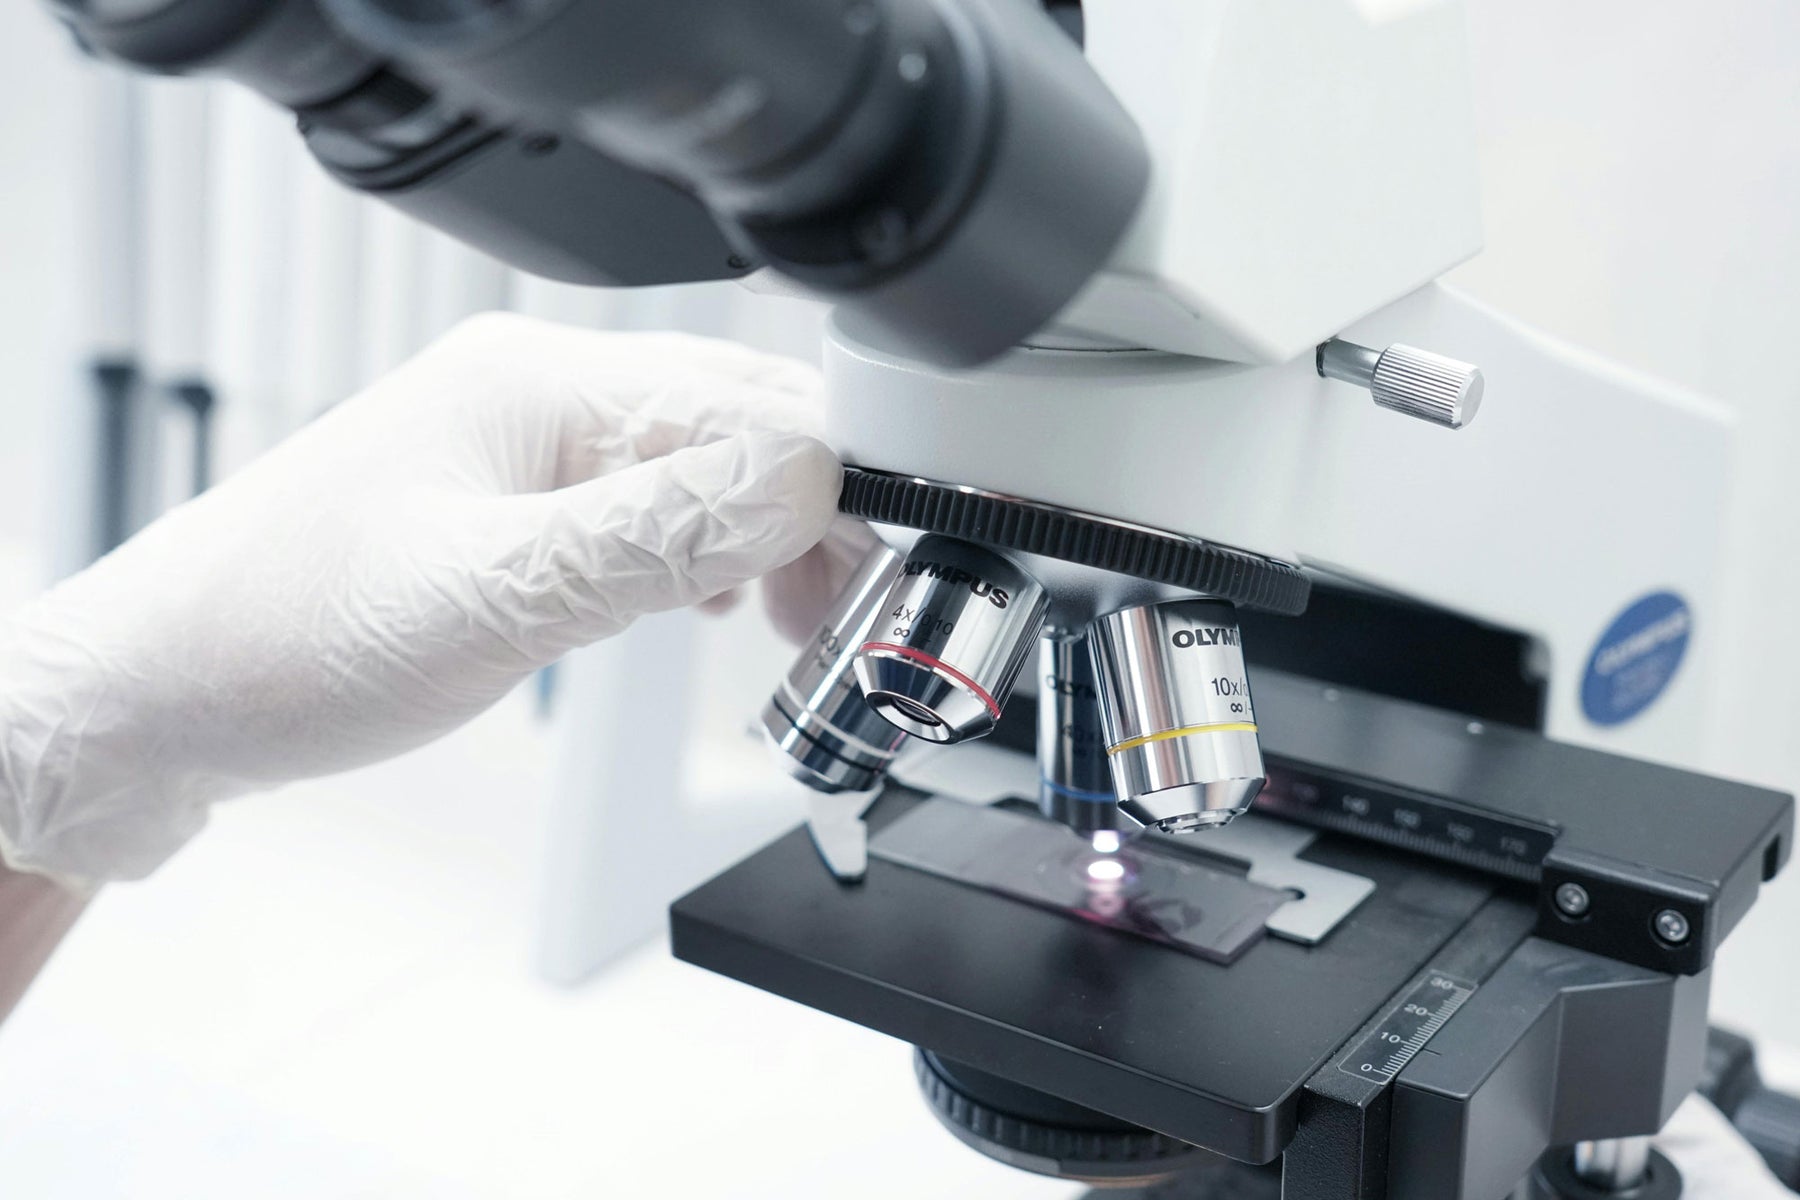
Get familiar with the parts of your microscope!
Before you get going, you’ll need know what parts of your microscope are located where.
Consult the manual if you have one or find a generic microscope diagram online if you don’t.

Learn about each of the controls, such as the coarse and fine focus knobs, the iris diaphragm, stage controls (if your microscope has a mechanical stage) and the illuminator controls.
Reading the manual will come in handy and might save you a hassle or two down the road.
Have a slide ready
It will be much easier to get the hang of your microscope if you have a prepared practice slide to look at.
You’ll need a specimen, a glass microscope slide and a cover slip.
Put your specimen in the centre of your slide and secure it with a cover slip. Always remember to use cover slips (they protect your scope from getting damaged or contaminated).
Set up your microscope
Let’s review the steps to prepare your microscope for use.
- Plug in your microscope and turn on the illuminator.
- Adjust the illuminator to a medium level and fully open the iris diaphragm.
- If you have an older microscope without a rack stop, lower the stage using the coarse focus control knob.
- Rotate the nosepiece until the lowest magnification objective lens (the shortest one – often 4x) clicks into place over the stage.
- If it’s a new or shared microscope, you might have to align the eyepieces to suit your eyes. Look down the two eyepieces – if you can see two different circles of light, you’ll need to move the eyepieces closer or further apart until the circles overlap and you can only see a single circle.
Using your microscope
With your microscope set up, it’s time to give it a spin.
- Place your sample slide on the stage of your microscope, making sure you position the centre of the slide directly above the light source.
- Lock the slide in place using the stage clips or holder.
- Looking from the side, use the coarse control knob to raise the stage so that the slide is just below the objective lens.
- Look through the eyepieces and adjust the illuminator to a comfortable level of brightness – bright, but not painfully so.
- While looking through the eyepieces, carefully adjust the coarse control knob so that the stage moves away from the objective lens until your sample comes into focus.
- Once your sample is in focus, use the mechanical stage controls (or physically move the slide, if you don’t have a mechanical stage) to move an interesting part of the sample to the centre of the image.
- Change to the next highest objective lens (often 10x) and use the fine focus control knob to bring your sample back into sharp focus.
- Repeat steps 5 and 6 with the next highest objective lens (often 40x). Again, using the fine focus control knob to make precise adjustments will make your image sharper and cleaner.
- At any point, you can adjust the iris diaphragm to increase the contrast and reduce glare. The best setting will be different for each level of magnification, so get used to adjusting it.
That’s all it takes to get a great look at most specimens.
To use the highest magnification objectives, such as a 100x, you’ll have to learn about oil immersion. It’s not difficult, but it does involve using immersion oil and a few additional steps.
Things to remember
- Only use the fine focus controls at higher magnifications. With the coarse controls, it’s very easy to accidentally ram the slide into the objective lens.
- Finding the right contrast with the iris diaphragm takes practice, but the results are well worth it.
- Don’t touch the actual lenses with your fingers. You’ll leave fingerprints that will distort your image.
- Protect your microscope with a dust cover when it’s not in use.